I have admired the Veritas Tucker vise for quite a while. It is a quality
made, smaller, pattern maker's vise. It never made the 'must have' list and is
fairly expensive. Additionally, I don't do the kind of work that would necessitate
owning one of these. When a gentleman liquidated the tools he had
bought on the road to his dream shop, he offered the Tucker and a
Veritas twin screw vise at a very reasonable price. Well, a bargain is a bargain
and necessary or
not, I picked up both of them.
With two new vises, I needed to do something with them and
I guess that would mean mounting them on a workbench. Since this is
'showroom' stuff anyway, I needed something as much for display as for use.
More 'show' than 'go', so to speak. I leafed through 'The Workbench Book' to
come up with my interpretation of Norm Vandal's shaker bench... which was
inspired by the Hancock bench, etc. There is really not a lot of similarity,
but the design looked like it would make good use of the different kinds of
wood I wanted to use. Anyway, click on the images for a bigger picture. Use your browser
backbutton to come back.
|

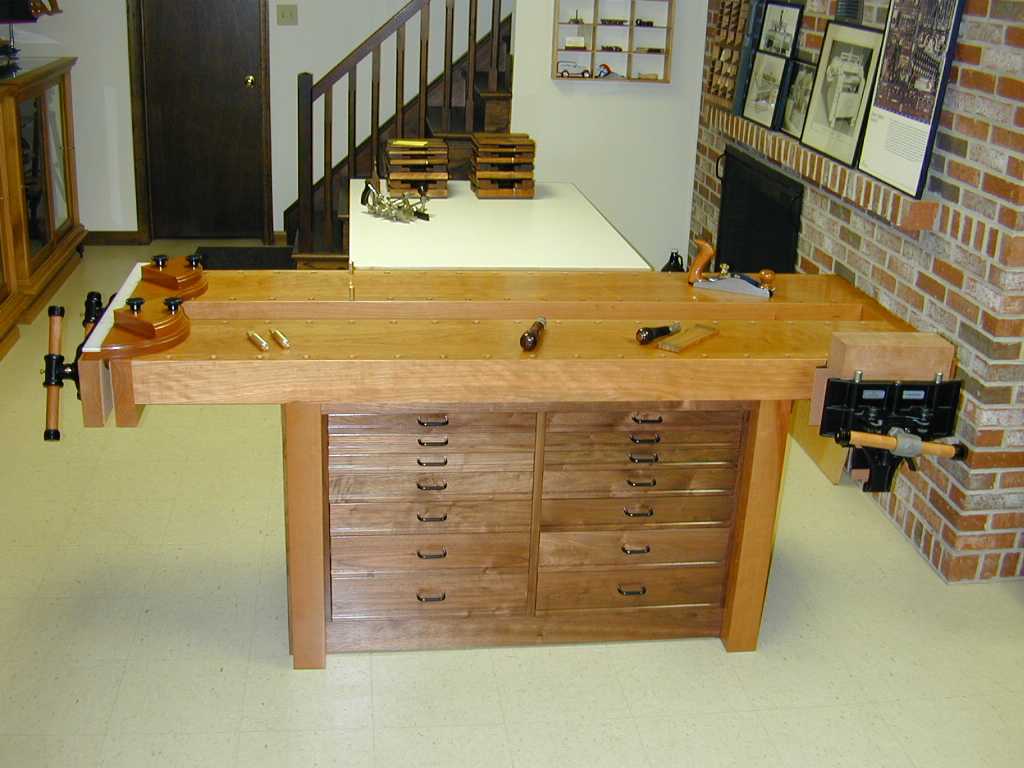
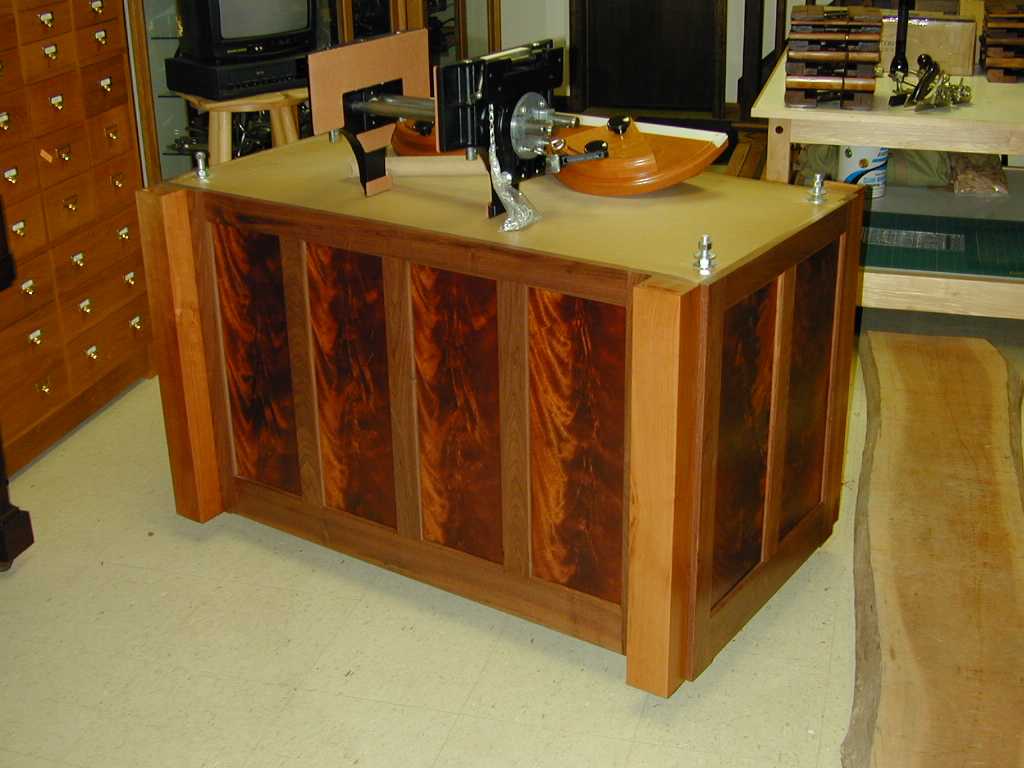
0207001
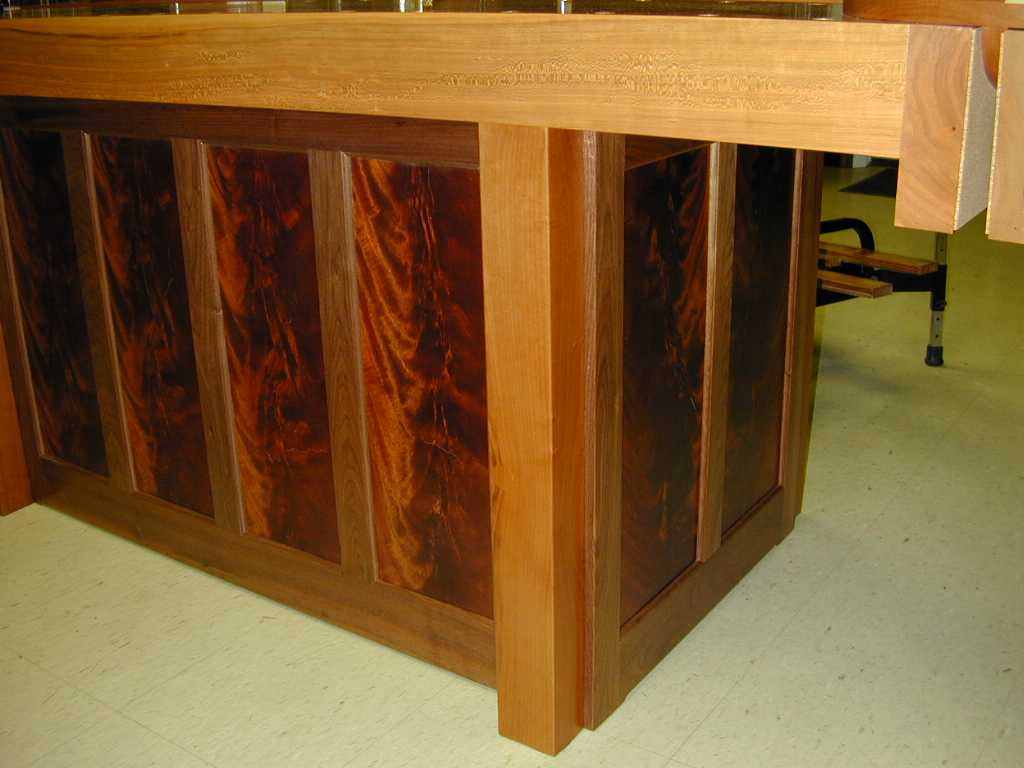
Here is the finished product. The base cabinet is made of walnut with flat
mahogany veneered panels. The top and support posts are cherry. The color is
all natural, no stain used. It has a too-shiny lacquer finish.
|

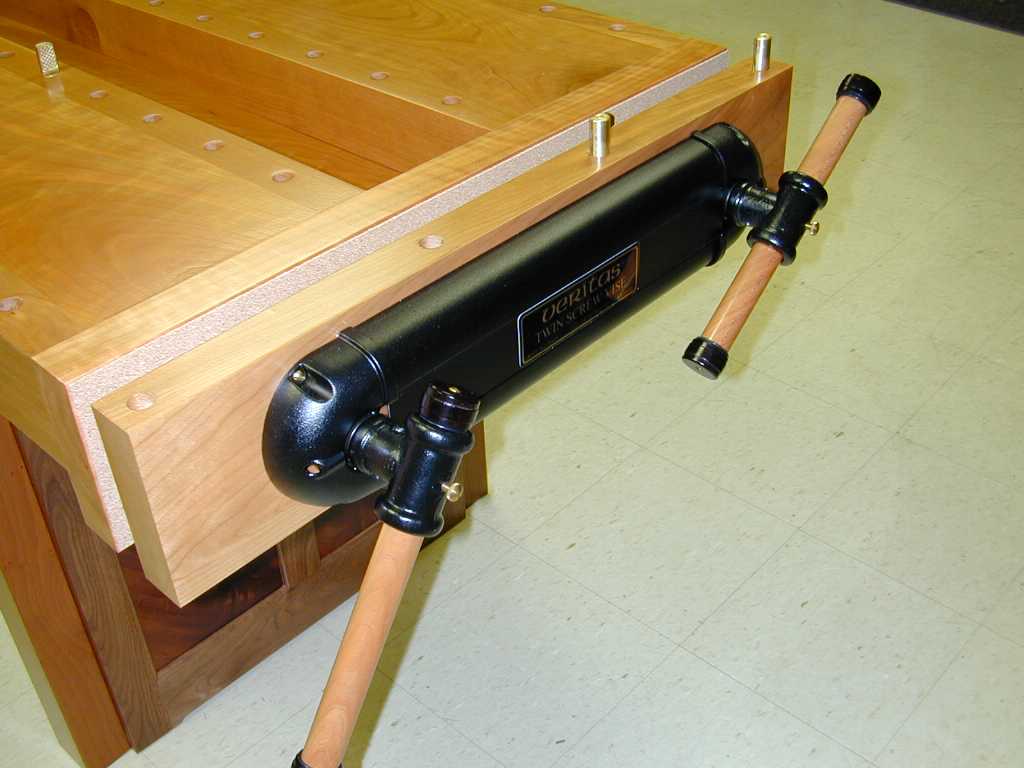
0207002
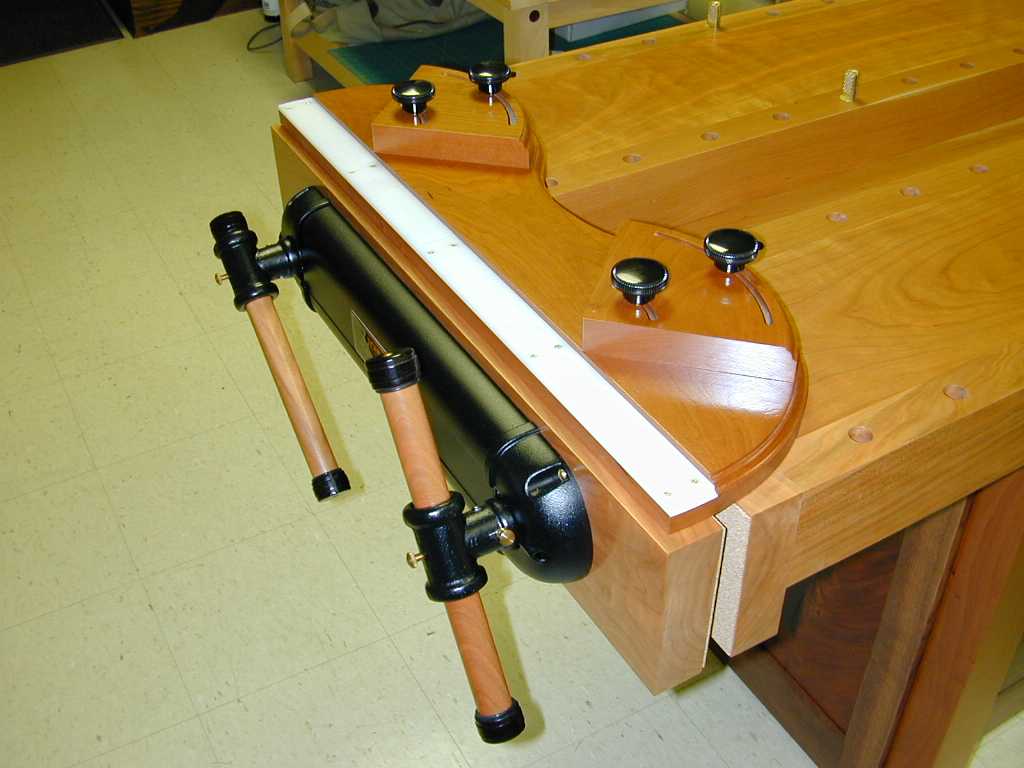
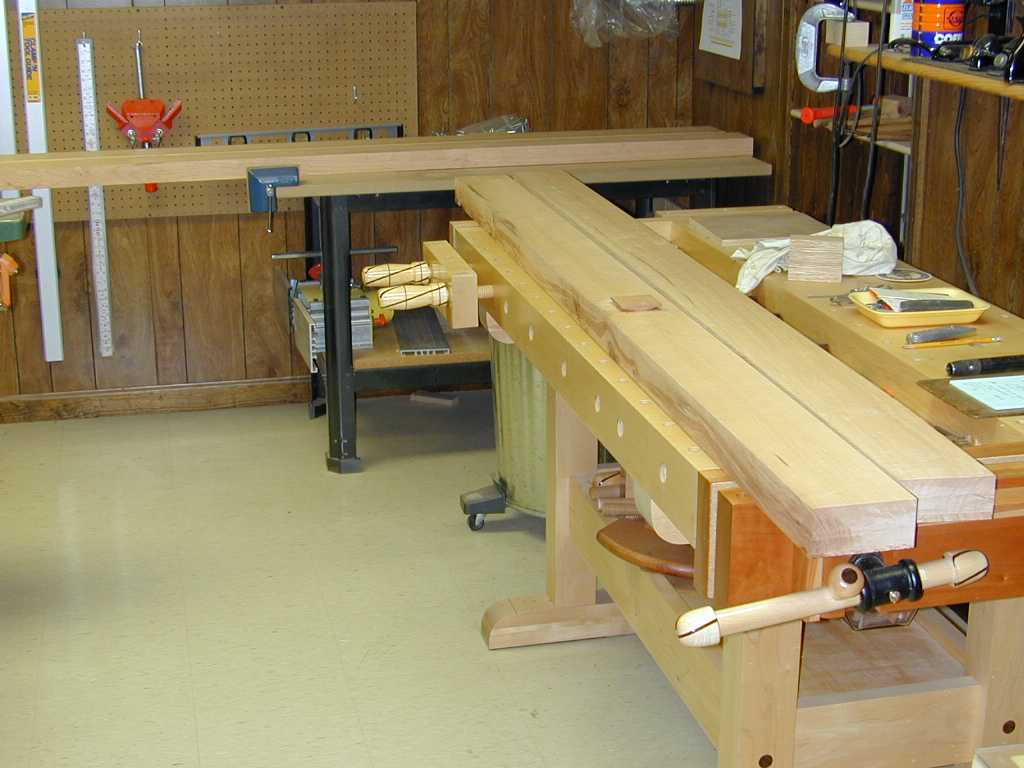
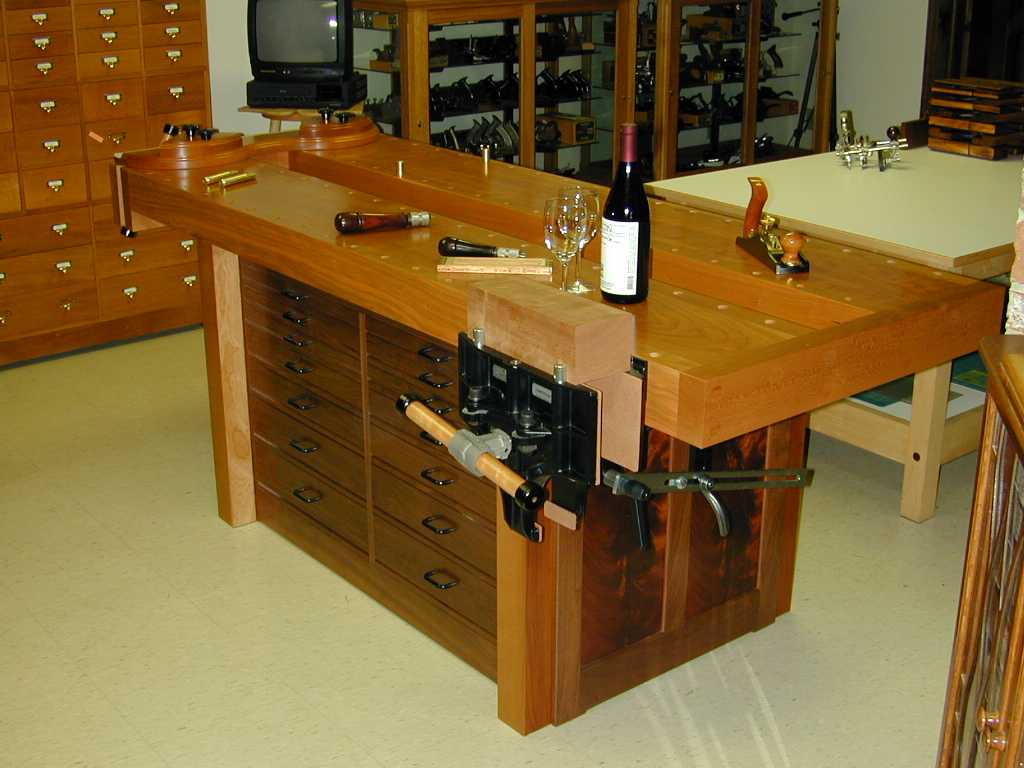
Here is the end vise. I opted for the new Lee Valley aluminum covers. The
jaws are lined with cork.
|

0207003
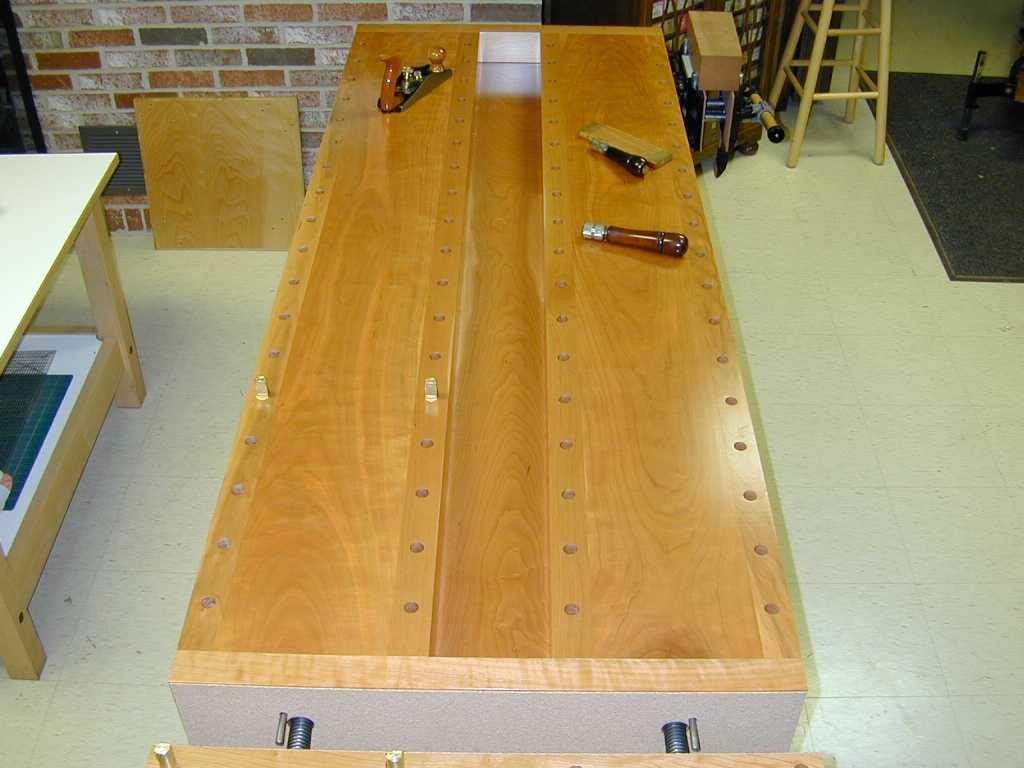
I went with the Lee Valley round bench dogs. There are four rows of dog holes
spaced on 4-inch centers. I turned the cherry vise handles but the end caps
are the maple caps that Lee Valley provides. I stained the caps with Ebony
stain and then touched them up with black magic marker between finish coats.
Er, well, that is all the stain I used...
|
|

0207004
This method of installing the plastic cover was offered on the Old Tool List
several years ago. If you come across one of these old plastic covers, this
installation method remains appropriate today.
|

0207005
I had to make a slight modification to the centerboard for my chute board,
but it works well in the new bench.
|

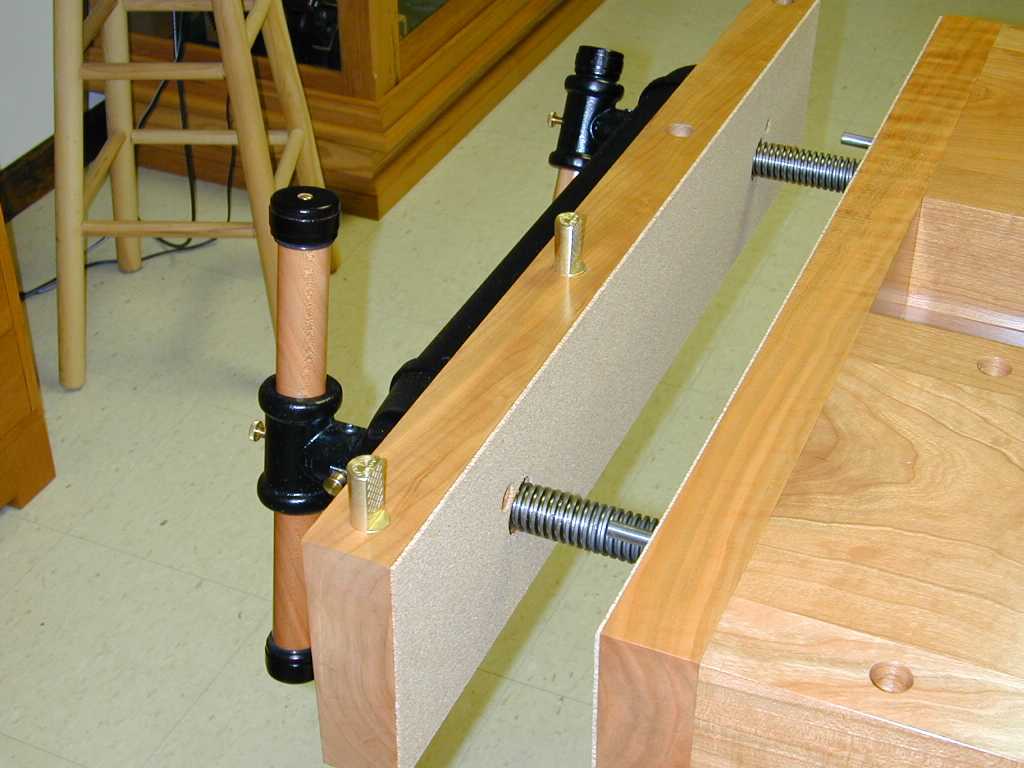
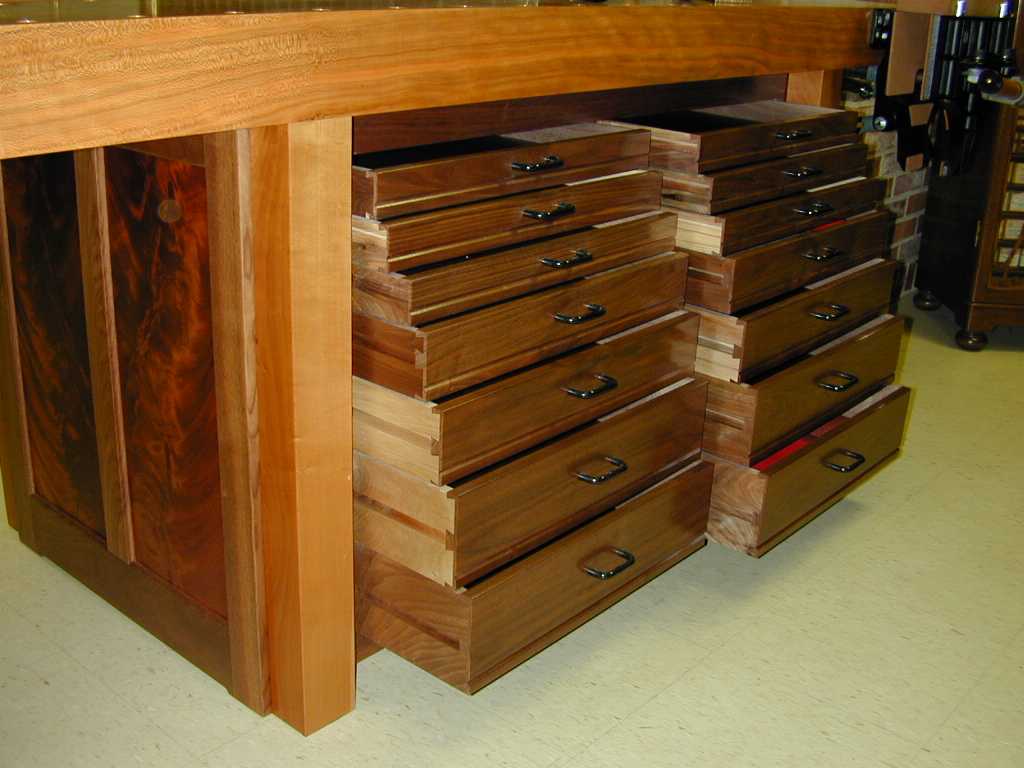
0207006
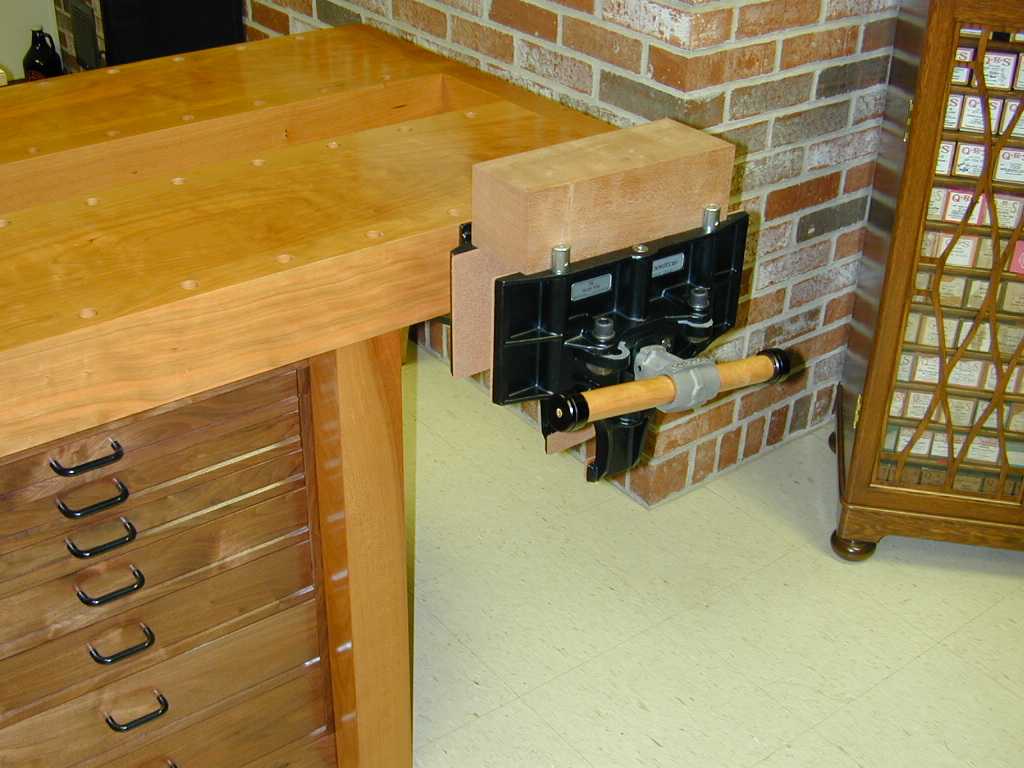
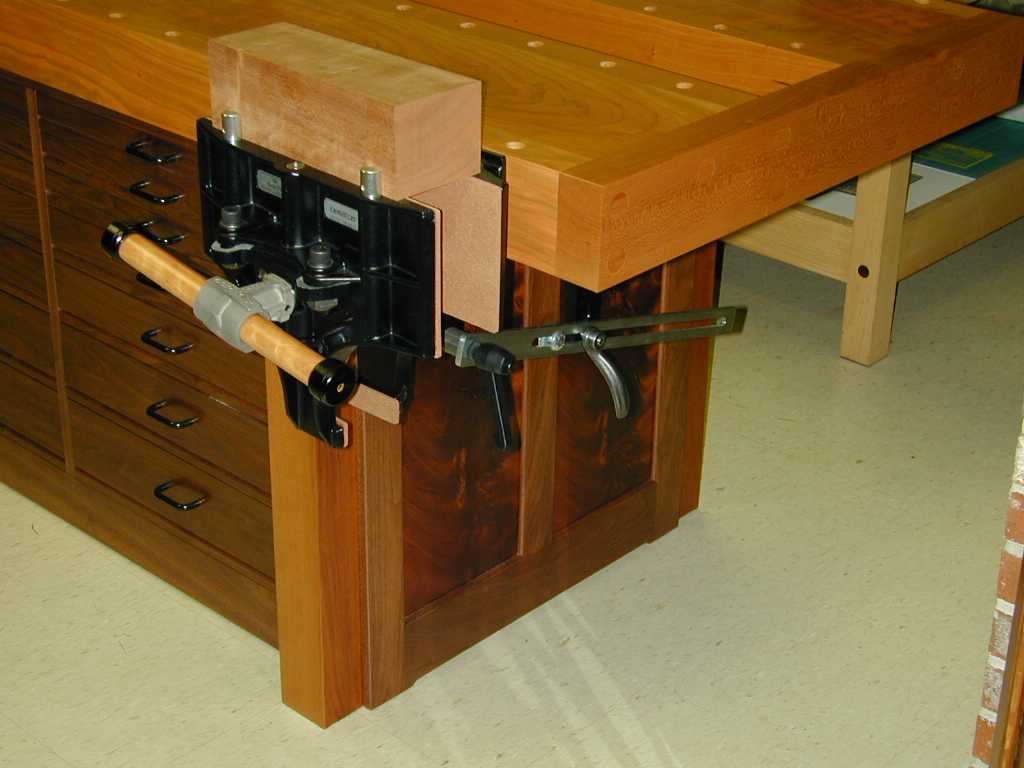
I made some minor compromises in the installation of the Tucker. As I mention
the bench dogs on the bench top are placed on 4-inch centers. I wanted to be
able to use the bench dogs, across the bench top, with the dogs in the
Tucker. The dogs in the Tucker are nearly 8 inches apart. All well so far,
but screws for the mounting plate on the vise are in line with the vise dogs.
So, there are two 'dummy' dog holes close to the vise. They look nice, symmetrical
and all, but they are only 3/4 of an inch deep. Defect or design license?
|
|

0207007
The end caps on the bench are held on with hanger bolts. This design allows
for wood movement, future disassembly, ease of handling while finishing, etc.
The end cap on the twin vise end is covered with cork. On the Tucker end
pre-finished plugs are friction fit in the 1-inch holes. You can see them
here.
|

0207008
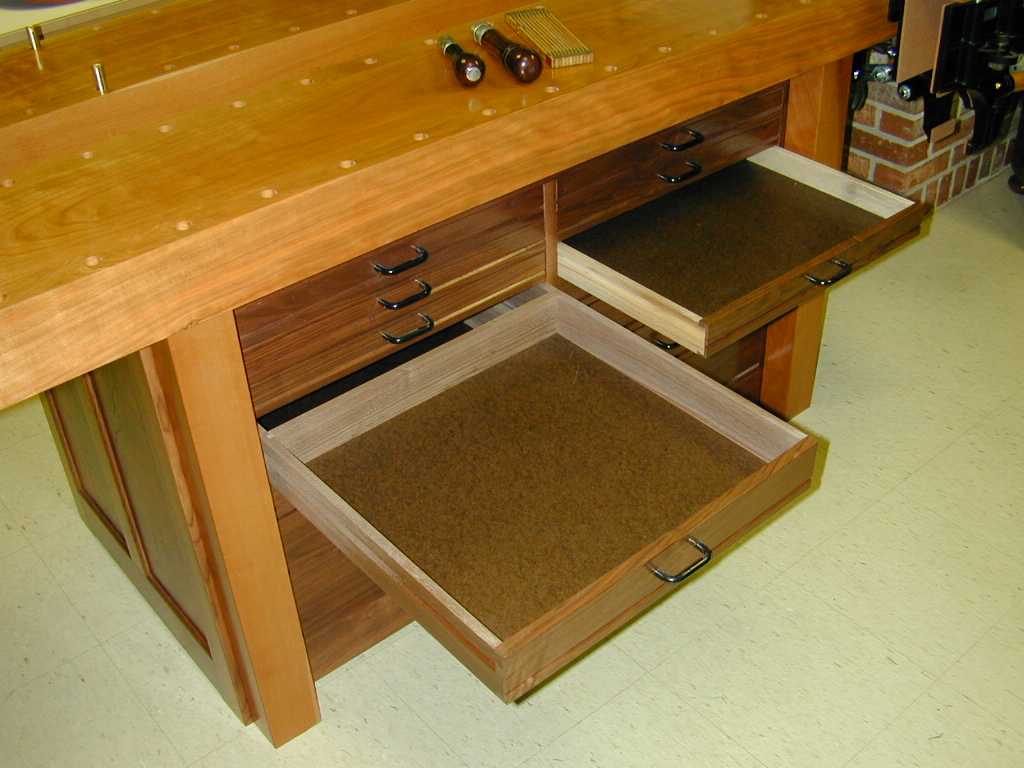
The drawer sides are longer than the useable drawer. This lets me fully extend
the drawer and clear the overlapping bench top. The drawers are dovetailed in
the front and full mortise and tenon in the back. They have hardboard
bottoms.
|

0207009
Excepting the bottoms, all the wood for the drawers is walnut. It's a good
place to use up not-so-nice boards with lots of sapwood.
|
|

0207010
Only the cherry heartwood takes on the nice color change with UV light. See
the sapwood in the bottom of the tool tray. At least the bug holes on the
bottom of the tray don't show through.
|

0207011
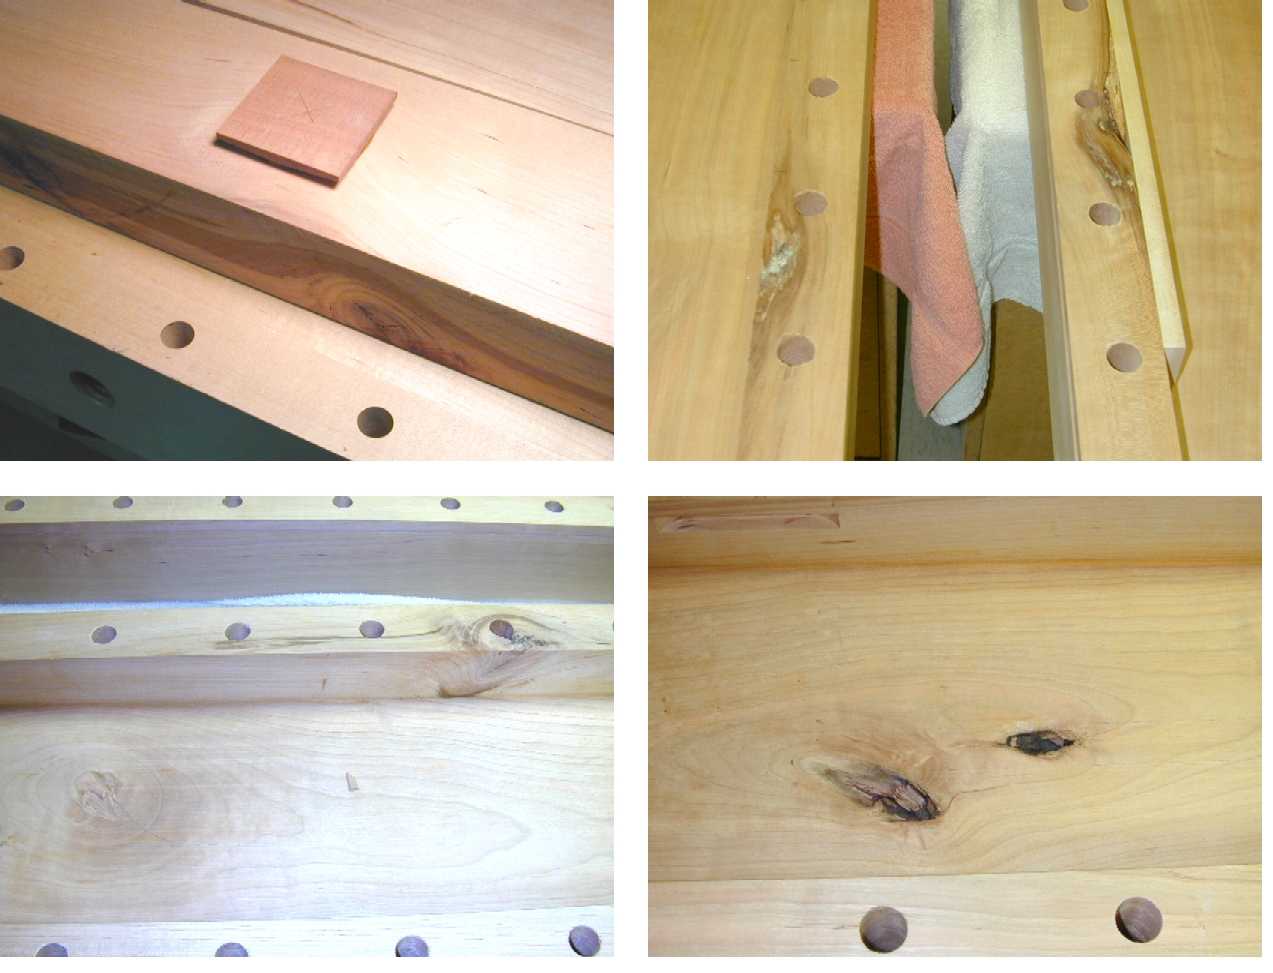
Lest anyone think I simply went out and bought a nice pile of clear cherry,
look here and reconsider. Now my stash of thick cherry only cost $1.00 a foot
but I was REALLY tough getting the wood I needed to make the bench. I had to
plug and patch in a couple places. The boards shown are the four sides of the
two 'U' channels that make up the top. That square plug in the middle of the
one board is actually a turned plug to fill a hole I ground out in the center
of the board. I put this board on the inside, at the tool tray. If you go
back to picture 002, at the top of the picture, on the side of the tool tray,
you can see this plug. There are a couple others. Finding them may provide
entertainment for the reader. :-)
|

0207012
Lest any doubts remain as to the quality of these planks, this composite
shows some of the defects hidden on the inside of the bench. Note the big
knot that runs diagonally through the piece where I inserted the big plug.
|
|

0207013
This picture was taken before I started making the top, but it shows one of
the planks there on the floor in its rough, curvy state.
|

0207014
This shows the nice grain in the poorly stored, yard-sale mahogany veneer.
The veneer was glued over flat MDF panels. There is some cracking in the
veneer but I view it as a 'feature' of my antique repro workbench. That's my
story...
|

0207015
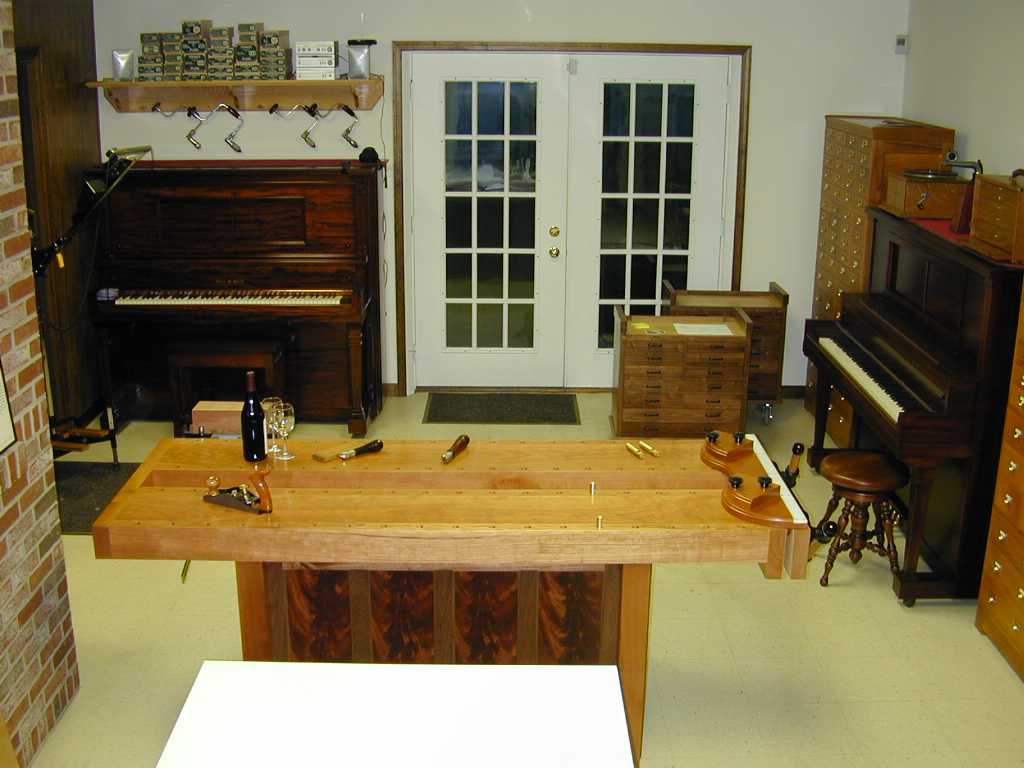
I fully intend to use this bench... gently, gradually, over time! In fact it
figures in special plans for this evening. Perhaps I should have laid out the
HNT Gordon Macassar ebony smoother rather than the bronze LN 164... Hmmm?
|
|

0207016
Needless to say the bench will reside on the 'clean' side of my shop. The
large white thing there is a Formica topped set up table. The two in-progress
roll-around benches are there in the back. I'm working on the tops for them
now.
|
|
|
Well, this bench took a lot longer than
I had planned. I'm not certain why it took so long. I figured it would be
finished in the May/June time frame... just in time to start summertime outdoor
projects. Fooling with the veneer took longer than I expected, I guess. Anyway,
it's done, and I'm pleased with it. Thanks for stopping by....!